


Photo by Glenn Carstens-Peters on Unsplash
Getting Started with Full Stack Web Development - MERN Stack
Part 1 - Getting started and setting up project Creating a functional TODO App


INTRODUCTION
Full stack development refers to the development of both the client-side (frontend) and server-side(backend) portions of an application. A typical application consists of both the frontend that the user interacts with and the backend that does all of the stuff that the user cannot see like storing data, retrieving data, updating data, deleting data, validation and much more.
In this tutorial, we are going to be learning full stack web development by using the most popular stack, the MERN stack which stands for MongoDB, ExpressJS, React, Node. The reason this is popular is because it utilizes just one programming language, JavaScript, the language of the web.
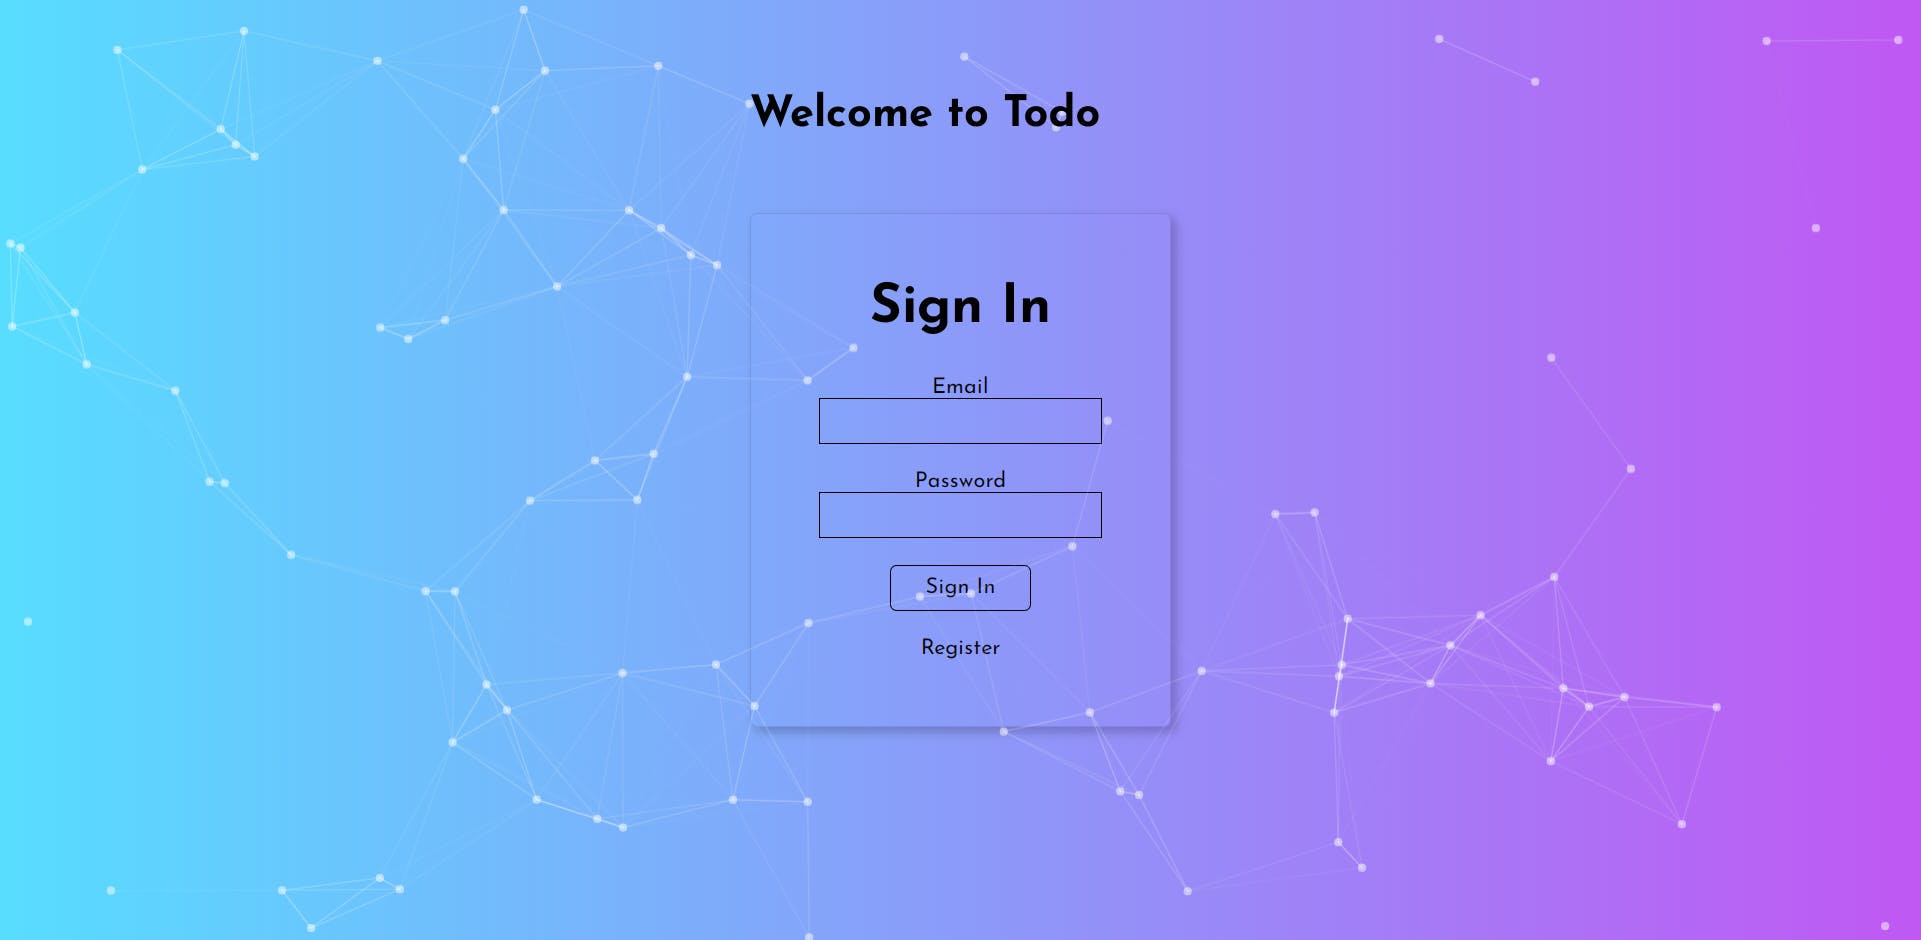
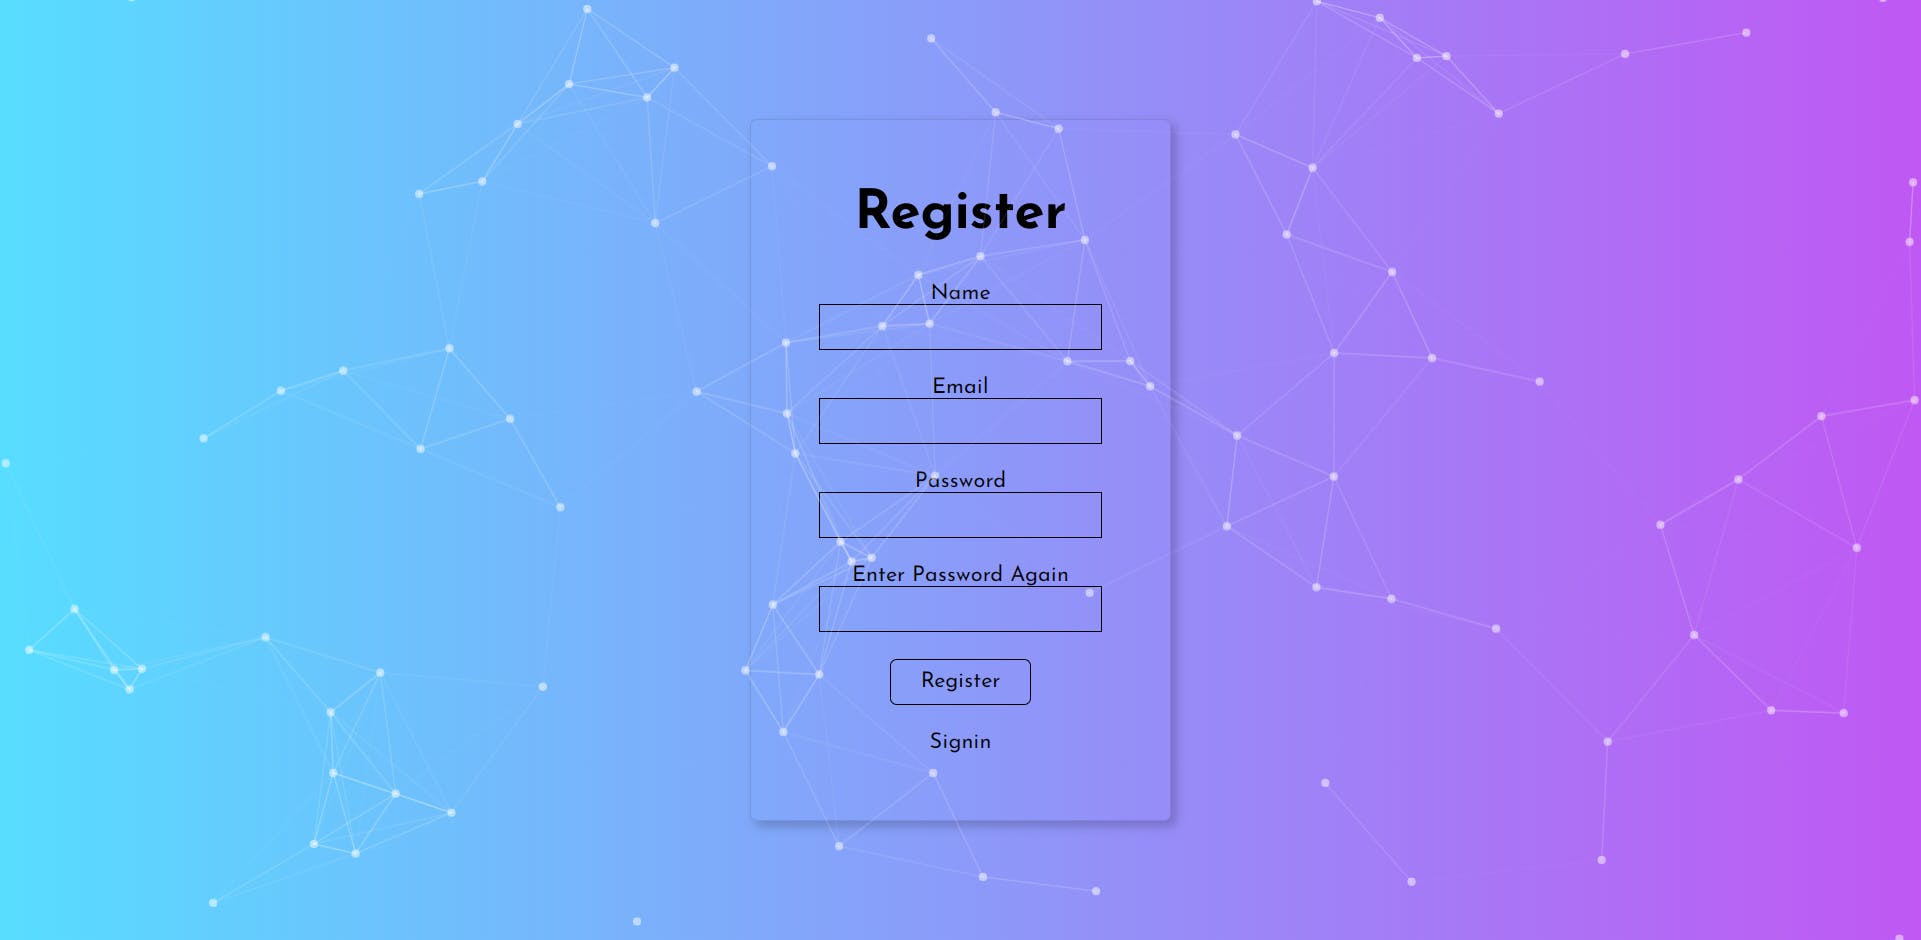
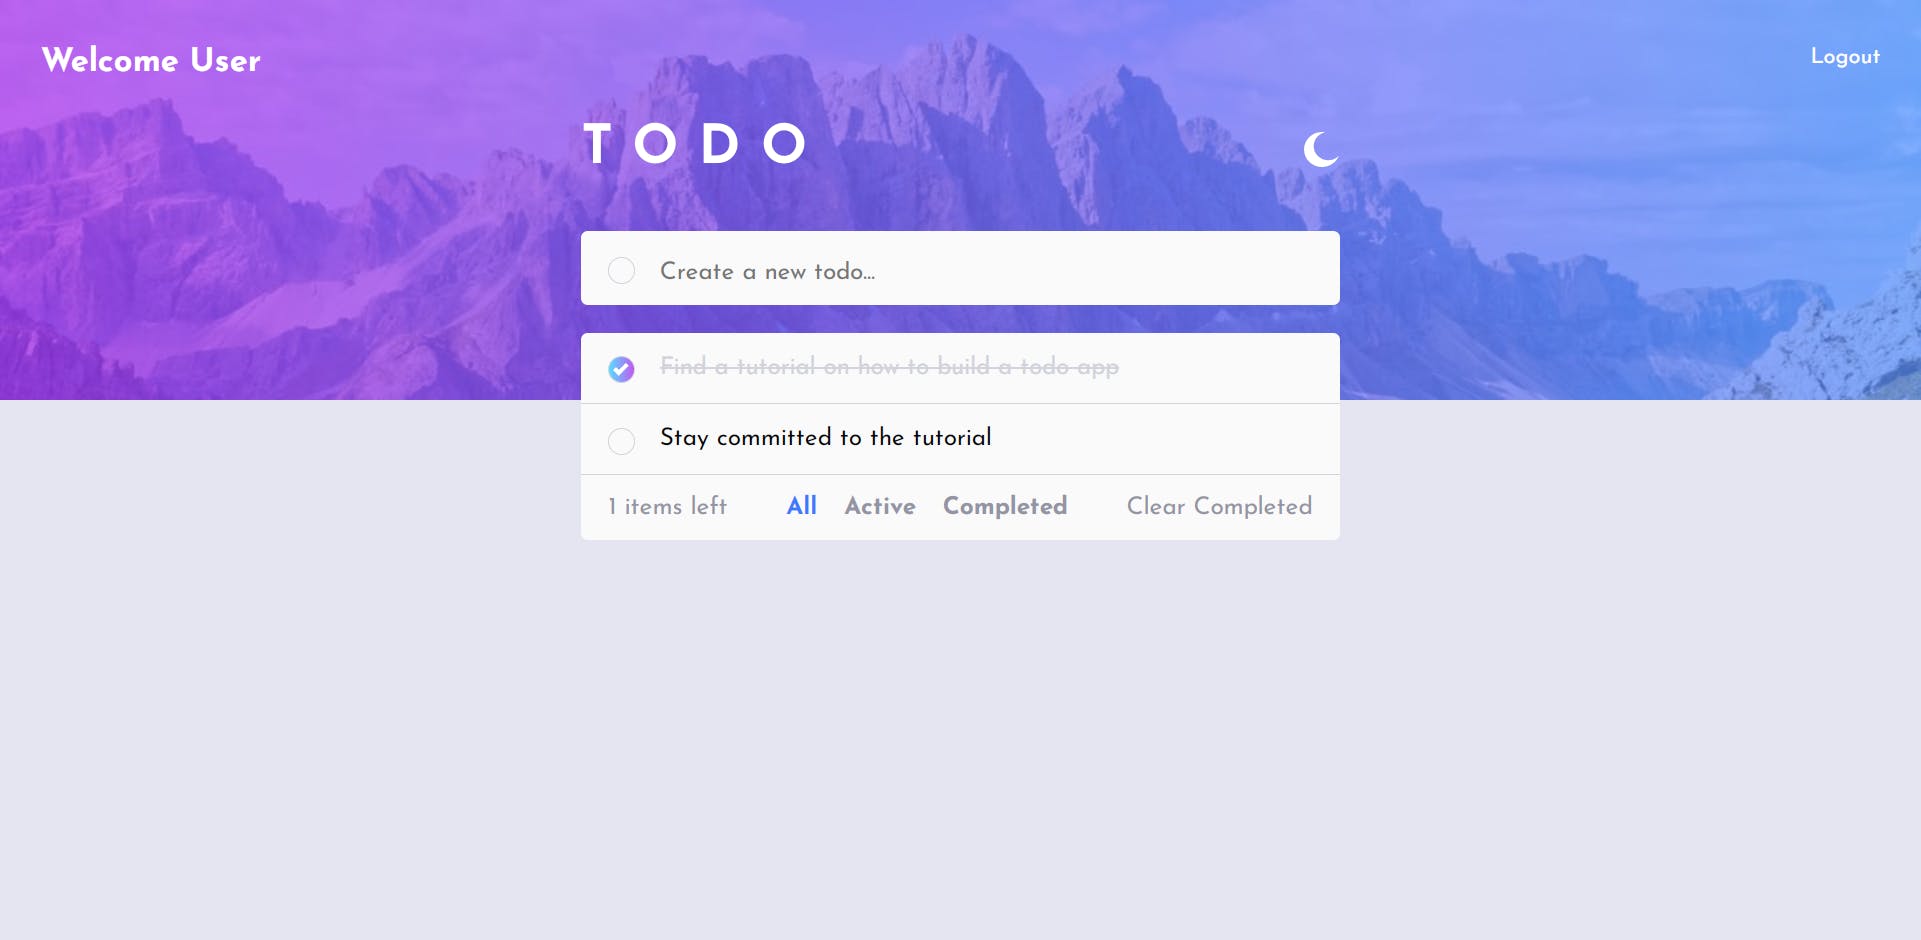
We are going to learn full stack development by building a functional todo app, that allow user to register, login, logout, create a new todo item, delete a todo item and marking a todo as completed and vice versa.
Below is a glance of what we are going to build.
This tutorial will be split into different parts so we can go step by step into making our app a reality, the last part of this tutorial will be based on deployment so as to enable the world have access to our app.
Trust you are ready for this, fasten your seat belts as we FLY!!!
Setting up our Project
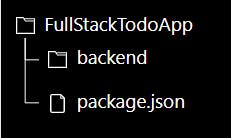
- Create a folder titled
FullStackTodoApp - Open this folder with your code editor, I will be using VSCode in this tutorial
- Run
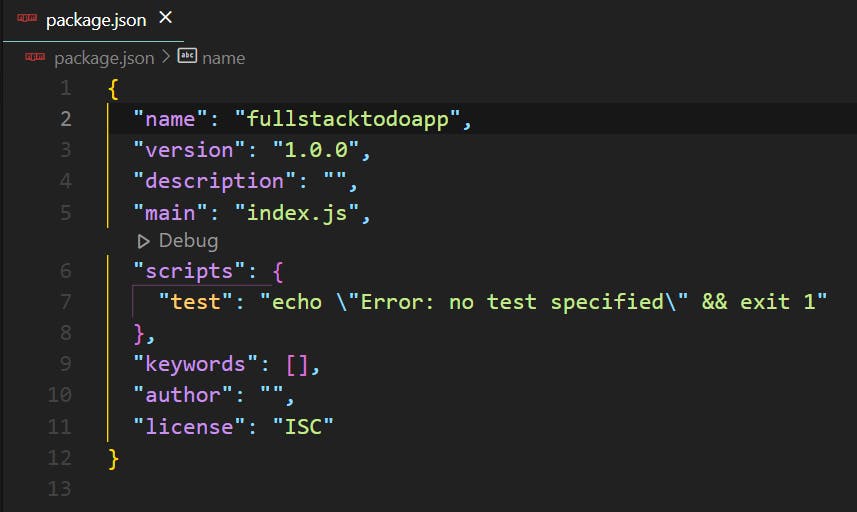
npm init -yin the terminal, this will allow npm packages to be installed in this folder and create a package.json file that contains information about the packages that will be installed while building this app.
The package.json file should look like this
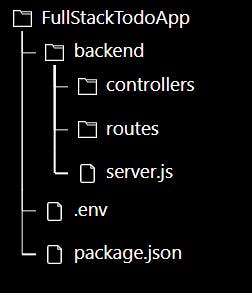
- Create a new folder
backend
- In our backend folder, we create a new file
server.js
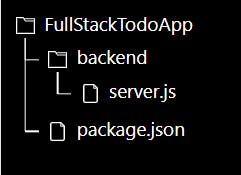
server.js will serve as our entry point for all our backend operations, we have to change the main in our package.json file to point to our newly created server.js, hence main in package.json will now be backend/server.js
"main": "backend/server.js"
- We will then install some npm packages that will help us create our server, run
npm install expressto install expressJS in our project, runnpm install -D nodemonto install nodemon as a dev dependency to track changes in our backend files without restarting the server. - Make some changes to
package.jsonby changing the scripts object to"scripts": { "start": "node backend/server.js", "server": "nodemon backend/server.js" }
Building the server and various routes
We will build a REST API that will interact with our frontend, this API will have the CRUD functionality(Create, Read, Update and Delete).
Let's get started in our server.js file by creating the server
const express = require('express');

const app = express()
const port = process.env.PORT || 5000

app.listen( port, () => console.log(`Server is running on port ${port}`))
From the above code, we set the app to listen to a constant called port which is defined as an environment variable(which we will create) or 5000.
To create the environment variable we need to create a new file .env in our root folder.
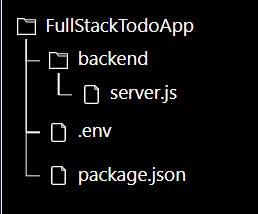
In the .env file, we create a variable PORT
PORT = 5000
Our app will ultimately run on port 5000 since both the environment variable and the hardcoded port constant is 5000.
To get the environment variable working properly we need to install a package for Node called dotenv, run npm install dotenv
In our server.js file, on top we bring in the dotenv package
const dotenv = require('dotenv').config()
We can now run npm run server to start the server.
 NOTE: Everytime there is a change in
 .env file, you have to restart the server again, nodemon does not detect change in .env file.
- We create a new folder in our backend folder, called
routes.
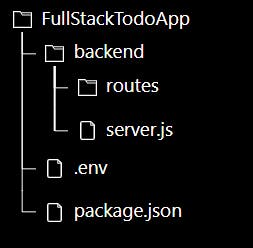
- Create a new file
todoRoutes.jsin theroutesfolder
todoRoutes.js will contain all our routes that relates with the todo
const express = require('express);
const router = express.Router();

router.route('/').get(getAllTodos)

module.exports = router
We are yet to create a controller that will handle the getAllTodos action. But before that, we have to define where the todoRoutes will point to in our backend application, we do this by adding the following code to server.js before the app.listen(...)
app.use('/api/todos', require('./routes/todoRoutes'))
- We create another folder in our backend folder called
controllers, this is the folder that will handle all API actions
- Create a new file
todoControllersin thecontrollersfolder
Creating an error Handler
We are going to create an error handler that will be used as a middleware to make catch errors easily, the reason for this is because we want to be able to view all errors as json.
- Create a new folder called
middlewaresin ourbackend folder, this folder will contain all our middleware.
A middleware is a function that executes during the request-response cycle and has access to both the req and res object. It runs between when a server receives a request and when it sends a response
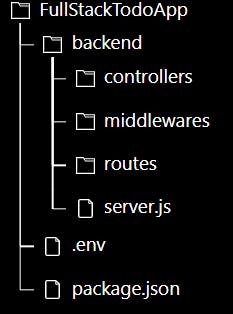
- In our
middlewaresfolder, we create a fileerrorMiddleware.js, this file contains the following code
const errorHandler = (err, req, res, next) => {
  const statusCode = res.statusCode ? res.statusCode : 500
  res.status(statusCode)

  res.json({
    message: err.message,
    stack: err.stack
  })
}

module.exports = {
  errorHandler
}
We have to bring in this errorHandler middleware to our server.js file so that our server can have access to it.
In server.js,
const { errorHandler } = require('./middlewares/errorMiddleware);

//The code below must be placed after all our routes have been defined

app.use(errorHandler)
To start building our controllers, we need to install a node package express-async-handler, is a simple middleware for handling exceptions inside of async express routes and passing them to your express error handlers, by running npm install express-async-handler.
Setting up Database
MongoDB is the database used in the MERN Stack, it is an open-source NoSQL database. It is a non-relational database and a tool that can manage document-oriented information, store or retrieve information.
We are going to use MongoDB Atlas, a multi-cloud based platform for mongoDB.
Click here to register on the mongoDB Atlas platform.
Follow the step below to set up your MongoDB atlas account

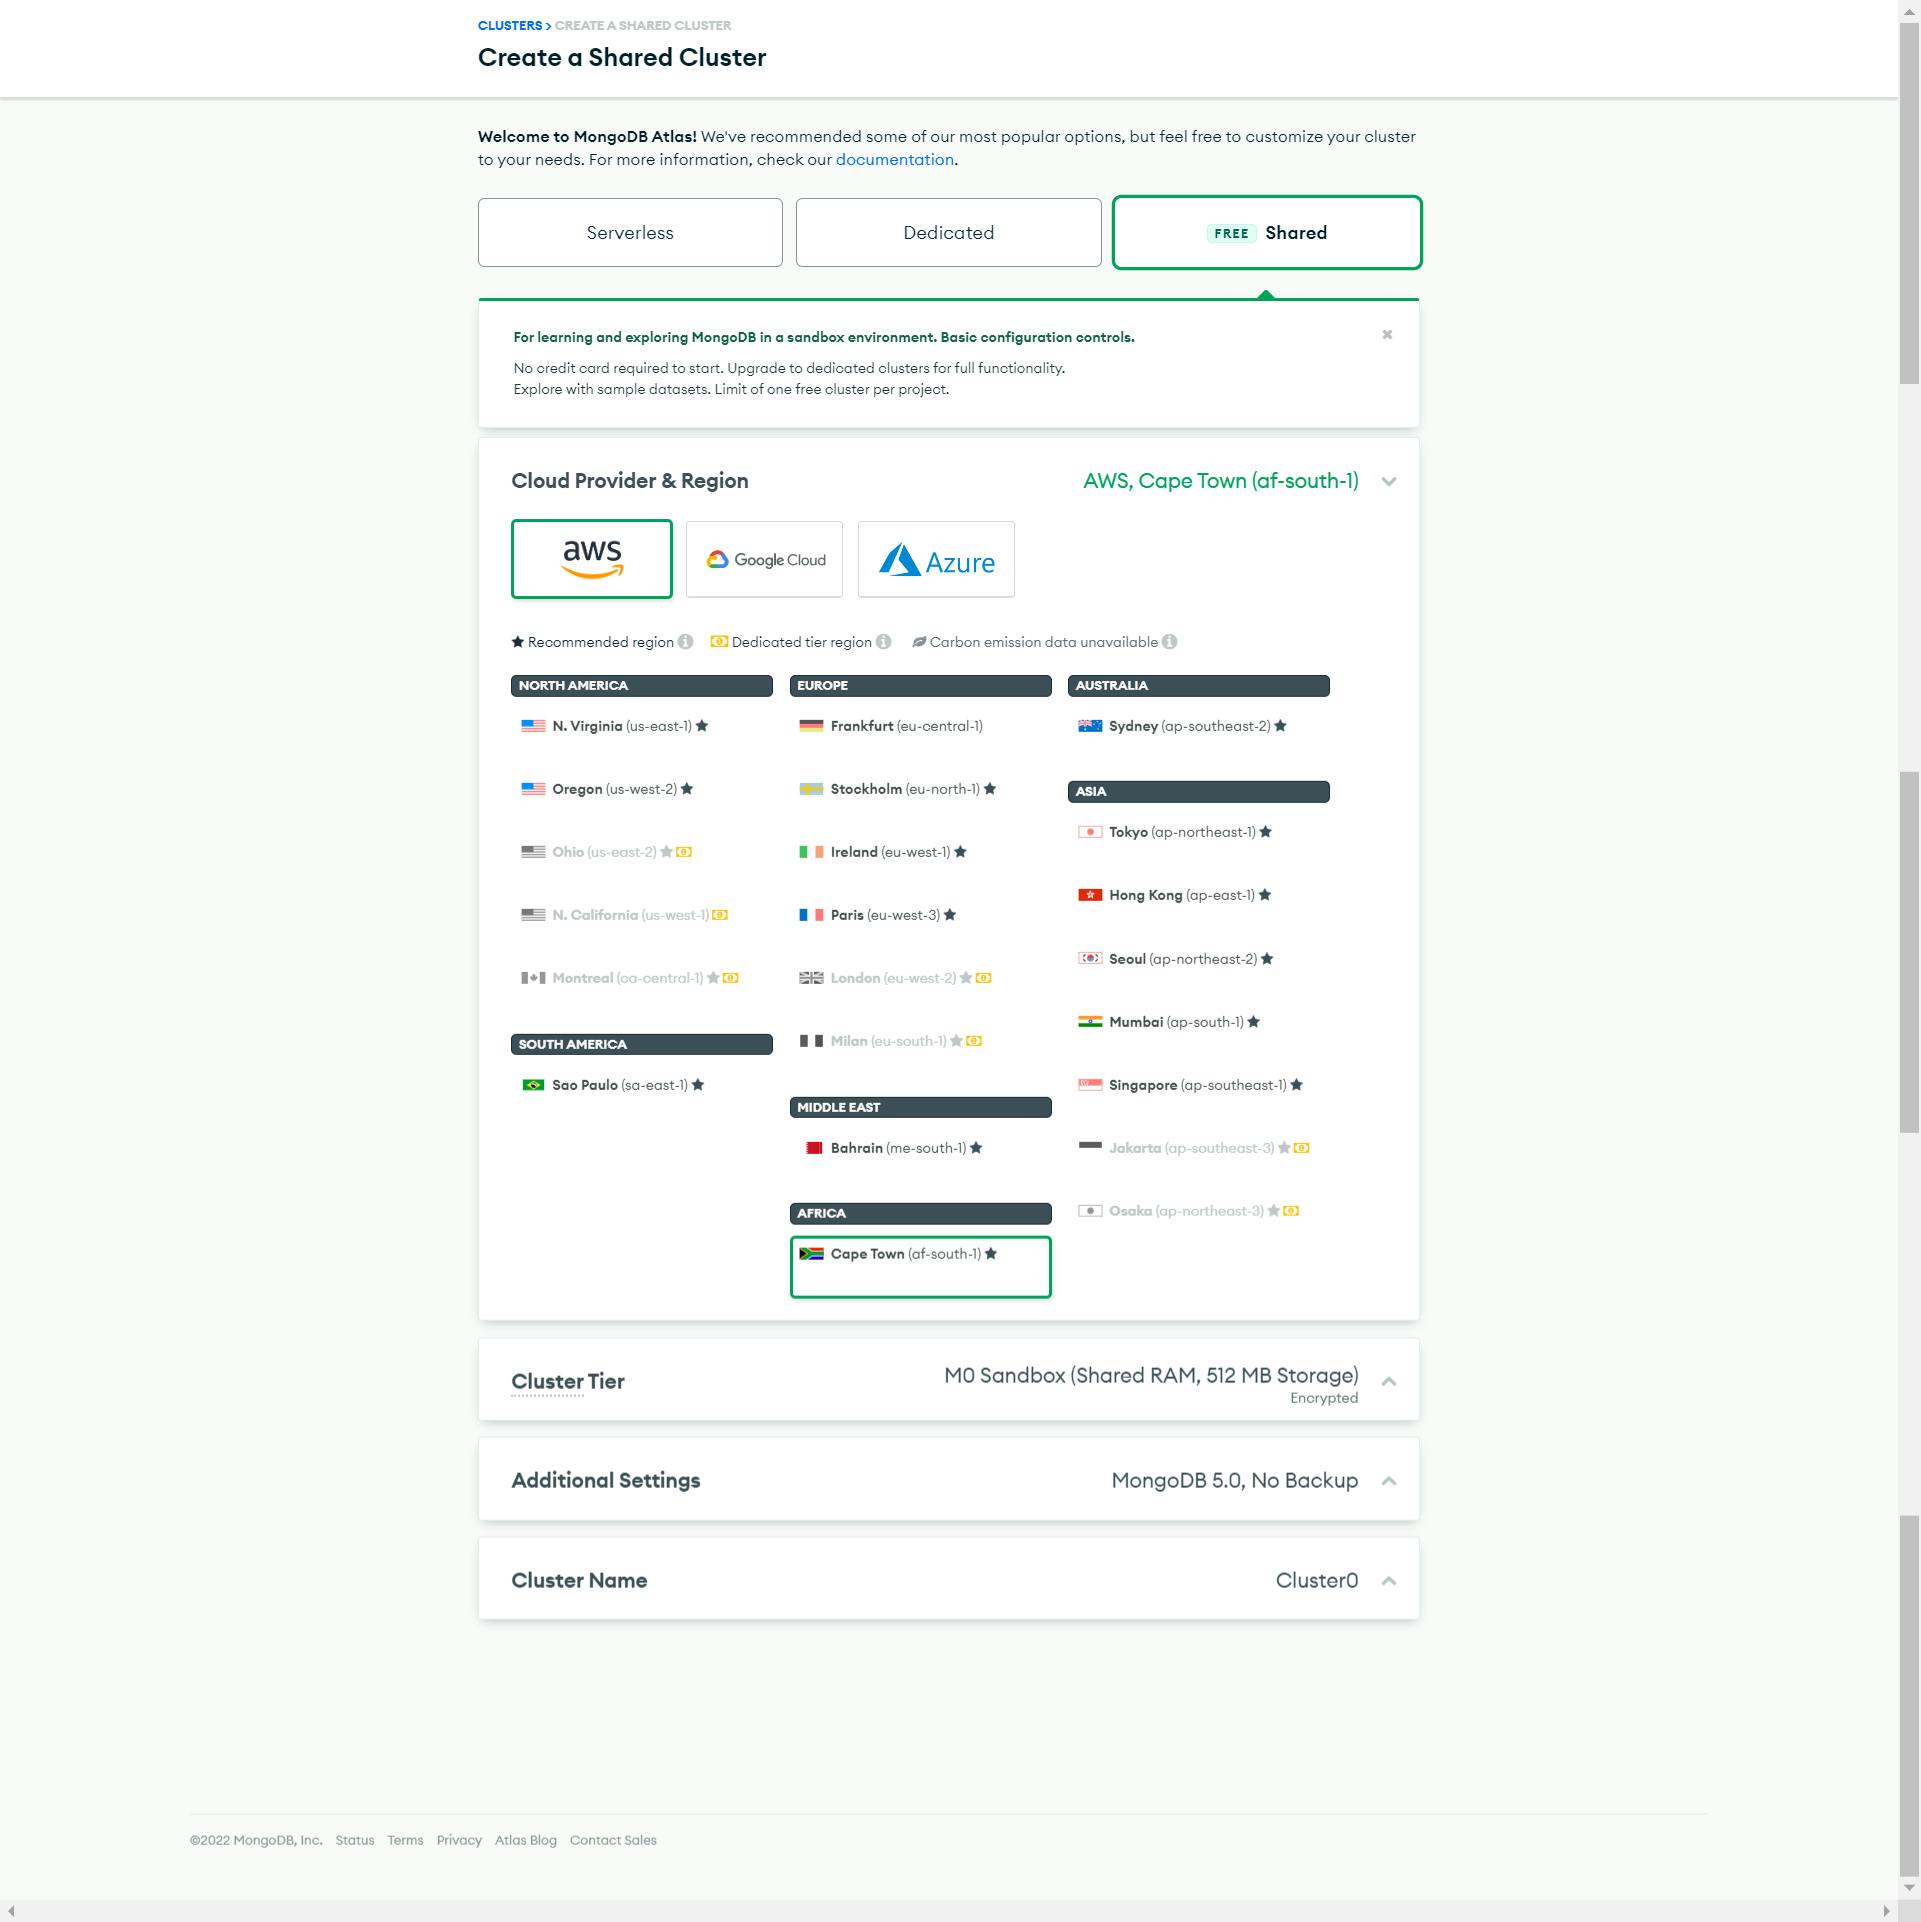 Select your appropriate region and you can leave the remaining option as the default
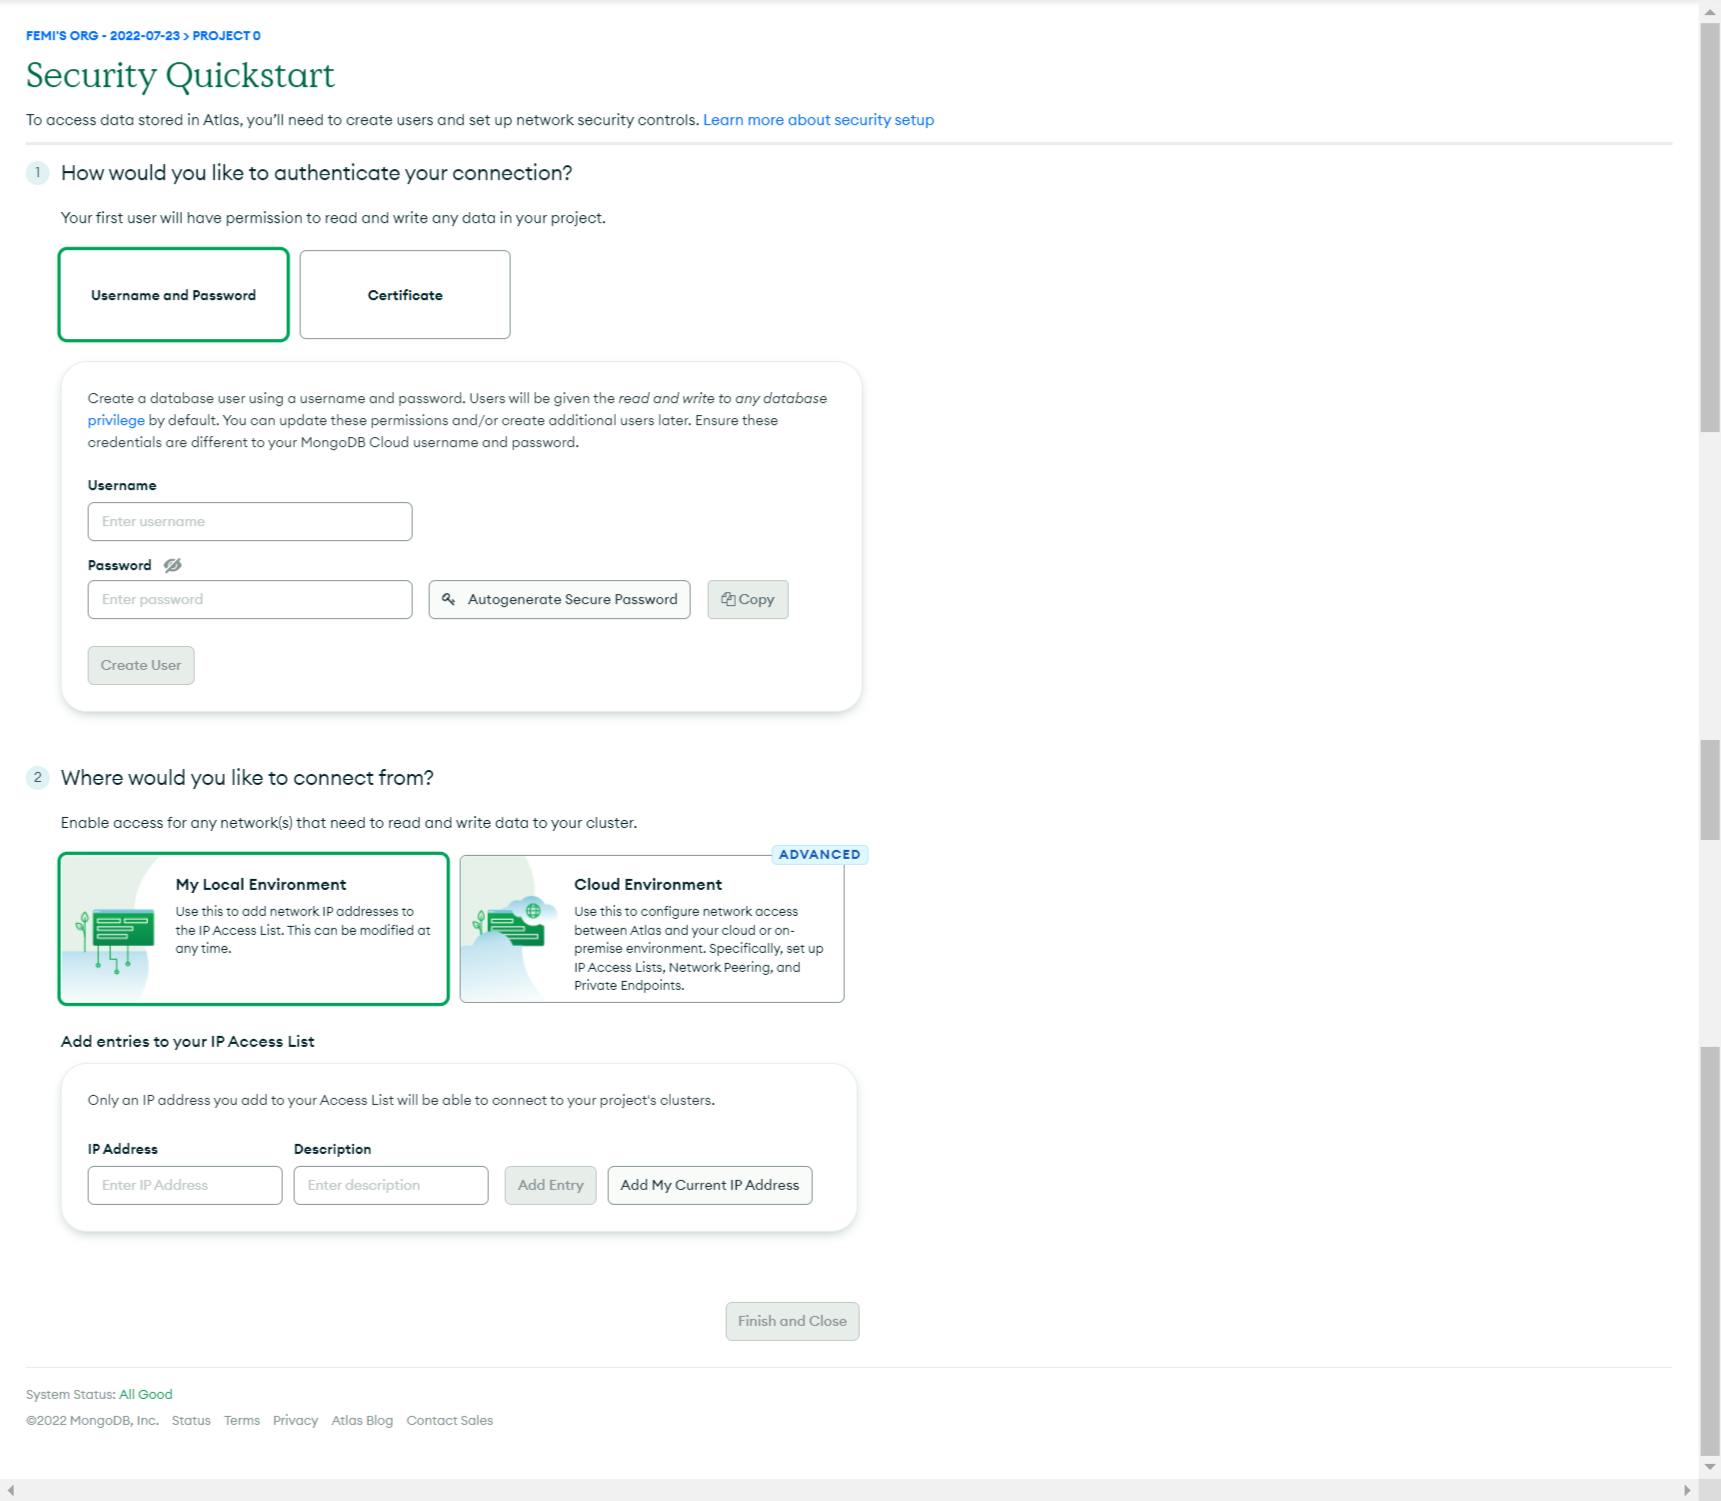
Input all necessary details, in the username and password section, in the where would you like to connect section section, leave as default. In the add entries to IP address, click add my current IP address to grant access to the database.
NOTE: In case your database won't connect, add 0.0.0.0/0 as an IP address to allow access from anywhere which is not a secured approach as it leaves your database vulnerable to attack
We are done setting up our database and cluster, we have to connect this to our backend application.
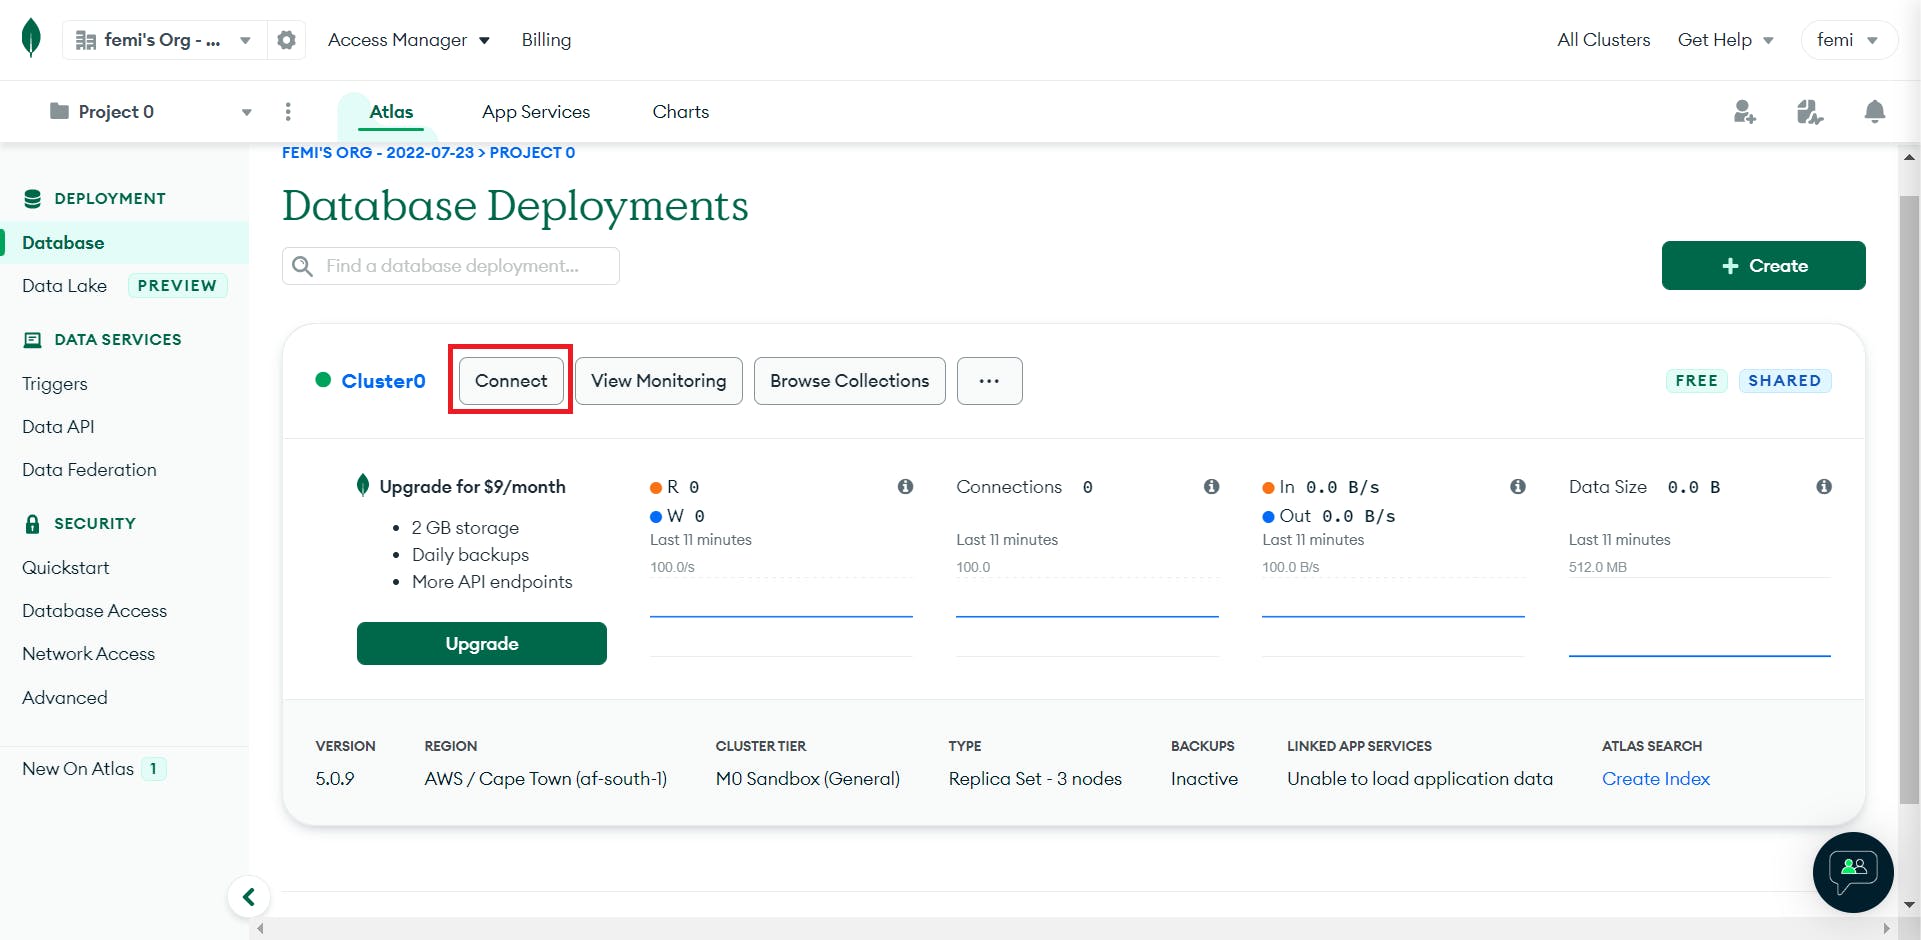
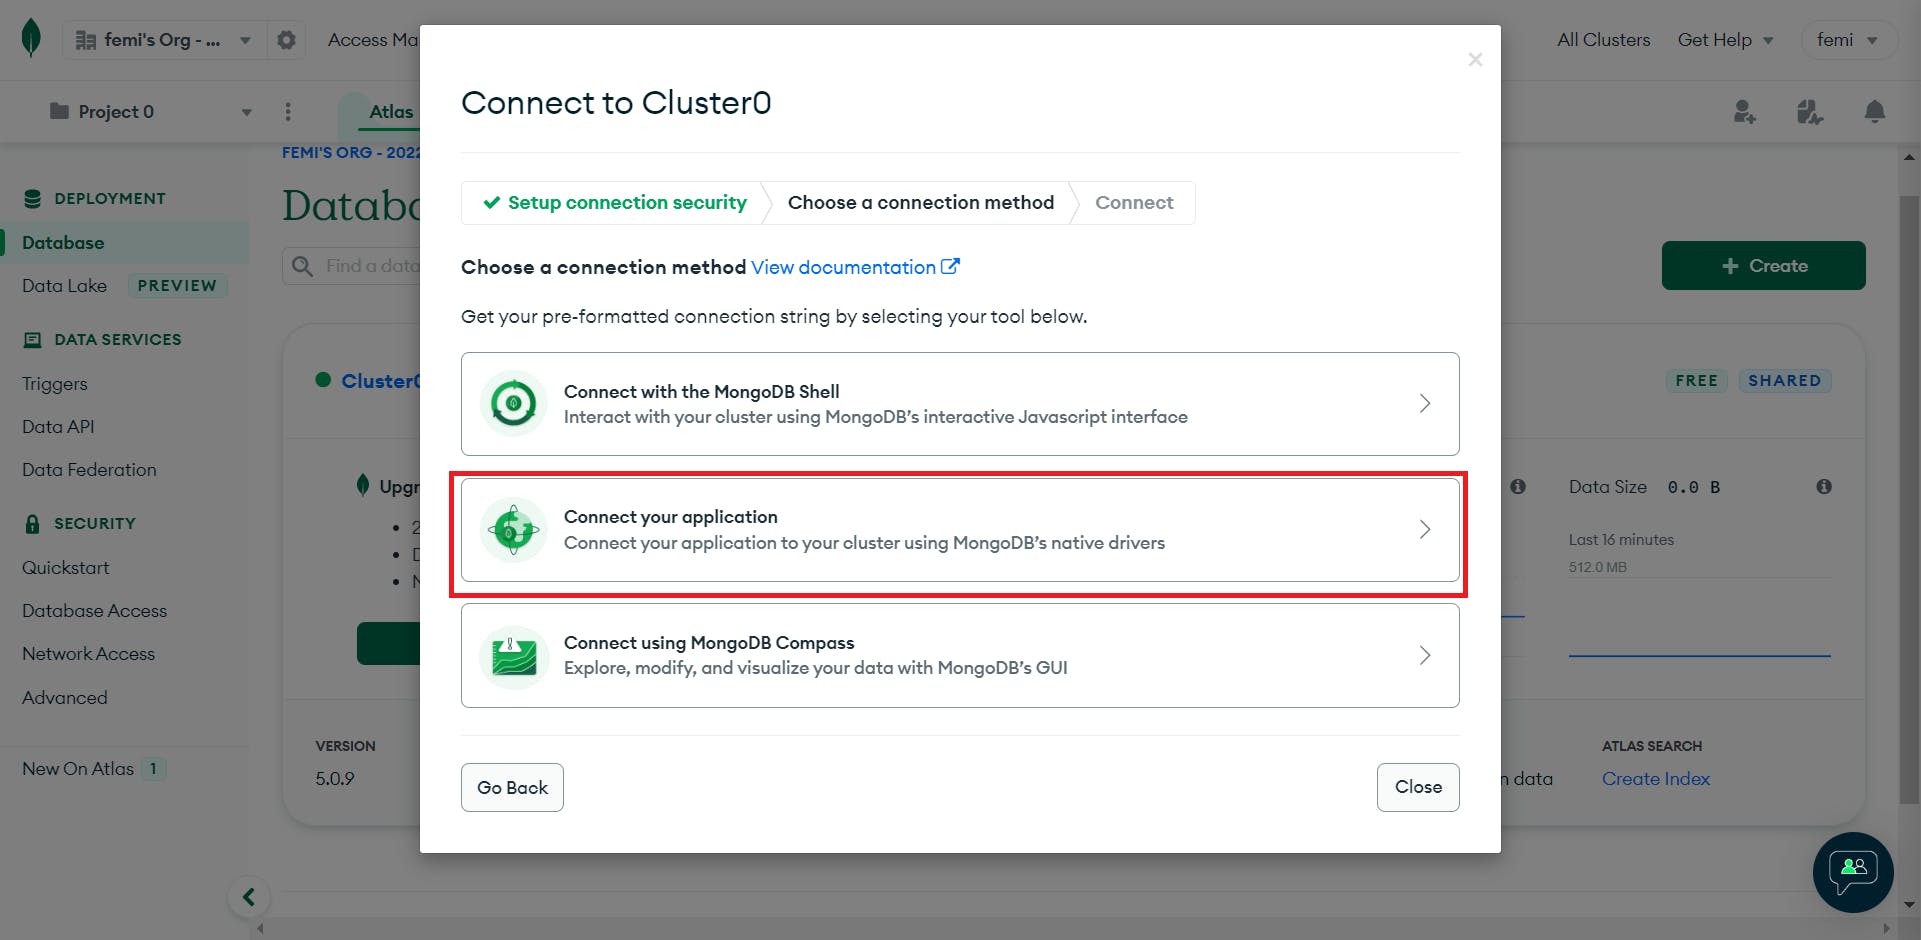
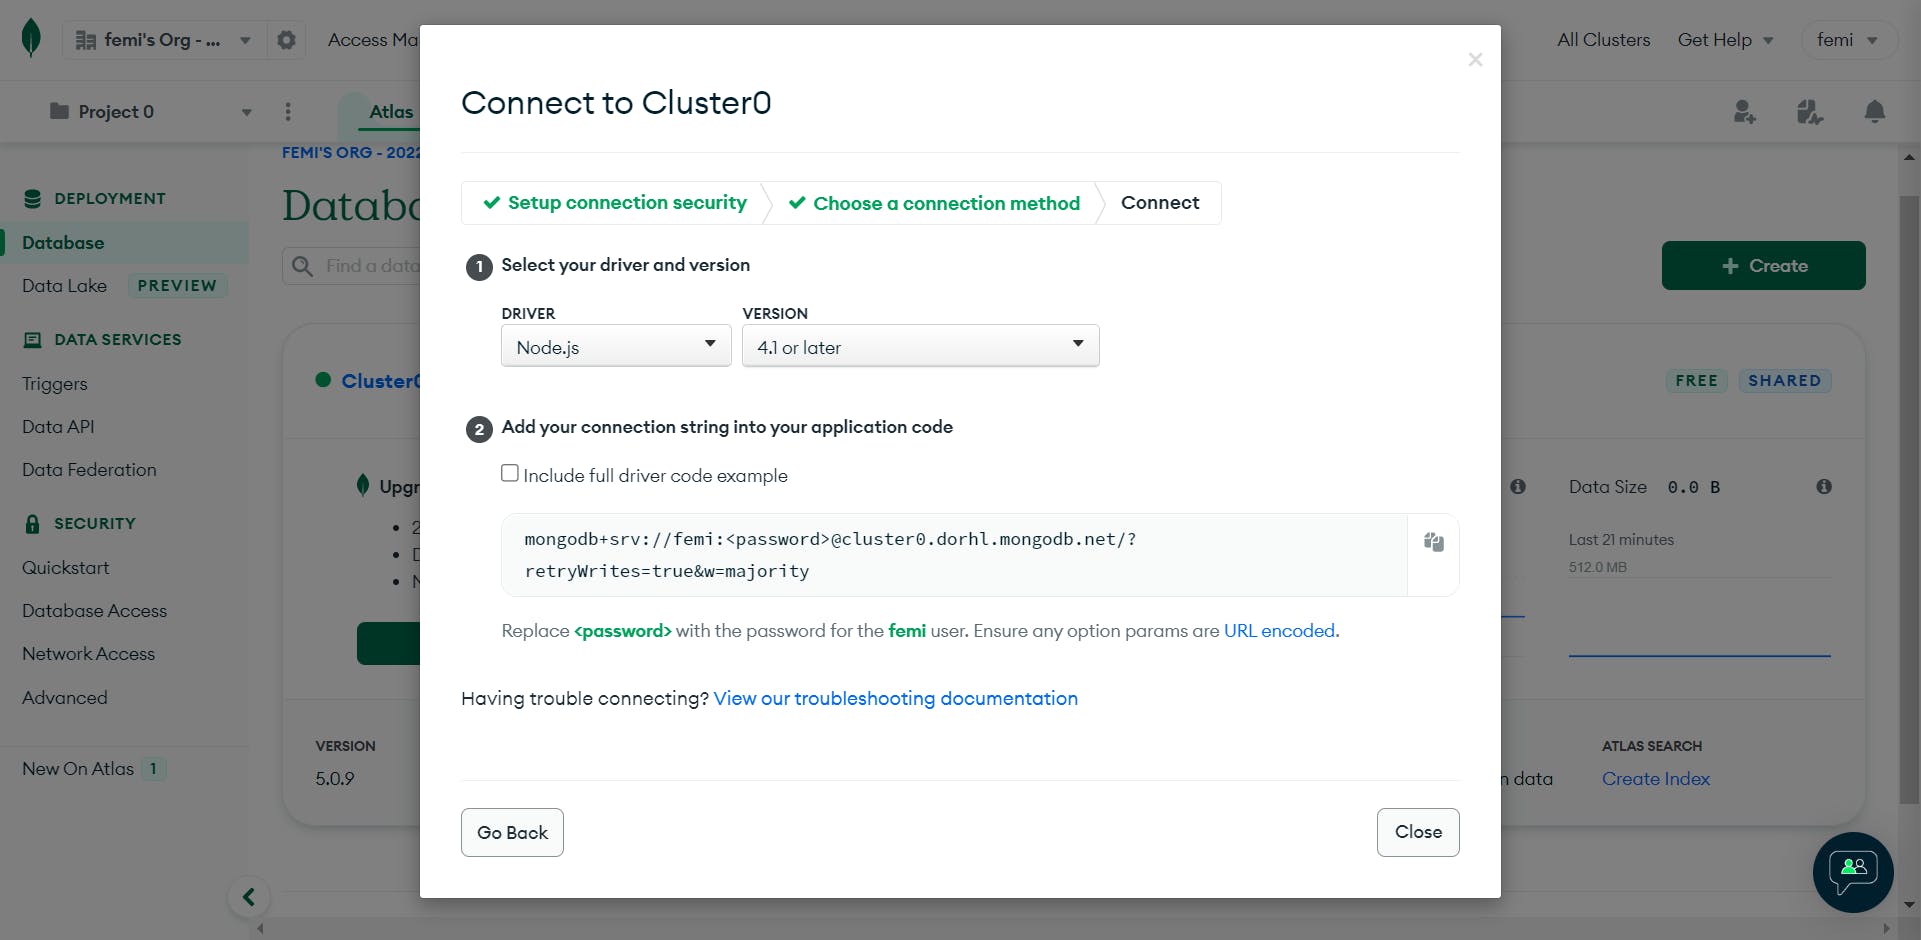
Copy the connection string and make the changes specified
You should have a string like this mongodb+srv://femi:mypassword@cluster0.dorhl.mongodb.net/todoApp?retryWrites=true&w=majority.
I added todoApp to indicate the name of the database I want to create.
We are done with setting up MongoDB atlas, next up is to connect atlas to our backend server.
To work with MongoDB in nodeJs easily, we install a package called mongoose by running npm install mongoose in our root folder.
- Create a new folder
config, that will contain the configuration of the connection of our database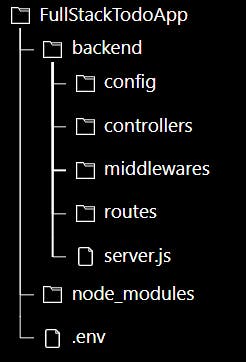
- In the
configfolder, we create a new filedb.js.
const mongoose = require('mongoose');

const connectDB = async () => {
  try {
    const conn = await mongoose.connect(process.env.MONGO_URI);
    console.log(`MongoDB connected to ${conn.connection.host}`)
  } catch (error) {
      console.log(error)
      process.exit(1)
  }
}

module.exports = connectDB;
We added a new environment variable MONGO_URI(the connection string that atlas gave us), which we will add to the .env file,
MONGO_URI = mongodb+srv://femi:mypassword@cluster0.dorhl.mongodb.net/todoApp?retryWrites=true&w=majority
Remember to refresh your server after adding this new environment variable
We then bring in connectDB to server.js,
const connectDB = require('./config/db);

// The code below should be placed after initializing the app, i.e const app = express()

connectDB()
Creating our model
Model simply refer to the content of our database.
- Create a new folder
models
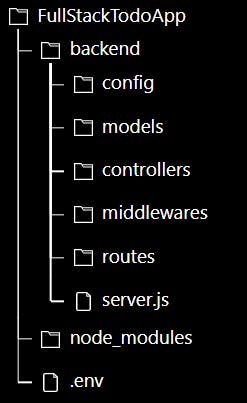
- In
models, create a new filetodoModel.js
const mongoose = require('mongoose');

const todoSchema = mongoose.Schema({
  task: {
    type: String,
    required: true
  },
  completed: {
    type: Boolean,
    required: true,
    default: false
  }
}, {
  timestamps: true
})

module.exports = mongoose.model('Todo', todoSchema)
The above code, creates a new schema in the database called todo, which has a property of task to record the task, it has a type of String and it must be entered, hence the required: true.
It also has another property of completed that tells whether the task is done or not, it is a required field also and has a default value of false. The timestamp added is to add time property to the todo of when it was created and updated.
We have successfully set up our project and we can start implementing various actions in our controllers folder.
We will continue in part 2 of this series.
Click the here to continue to part 2
All Codes can be found on here